Excel macros make repetitive tasks easier. It’s similar to having a “speed dial” on your phone. With the press of a button you can call a friend vs having to manually punch in the number.
Macros work the same way. With macros you can record actions and even have Excel do formulas.
Like the speed dial on your phone, you can assign shortcut keys to macros.
Recording Your First Macro
To record your first macro we will need to enable “developer mode” in Excel. By default this is hidden.
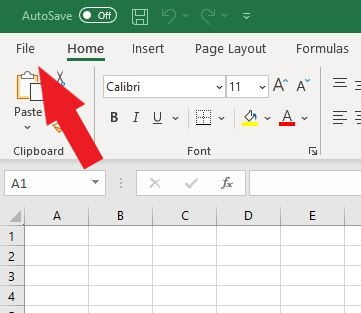
Choose File at the top left corner.
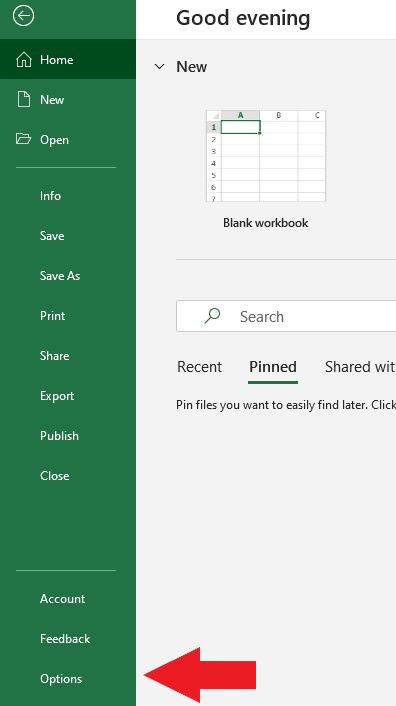
Select “Options” at the bottom left.
In the Excel Options dialog box, select Customize Ribbon.
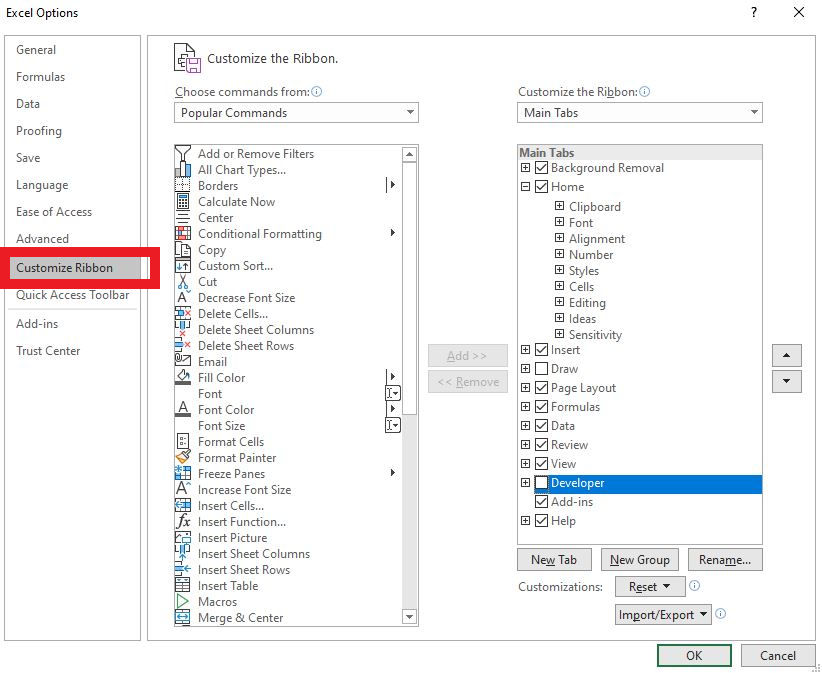
In the list box on the right, place a check mark next to Developer.
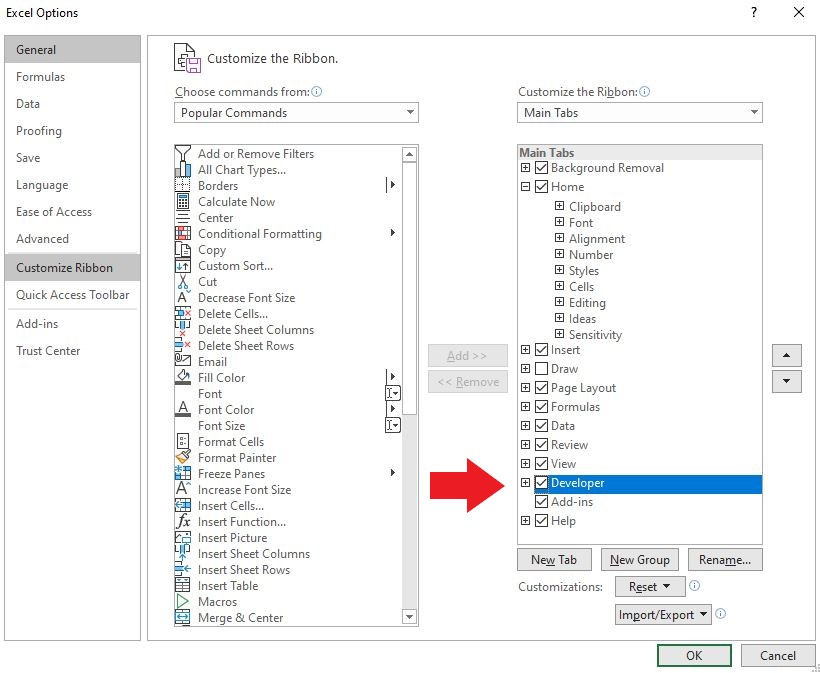
Click OK to return to Excel.
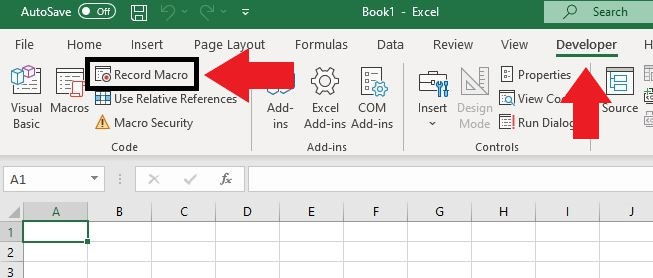
Now you are ready to record your first Macro. You should now see “Developer” on your toolbar. Click on it and you will see some new options.
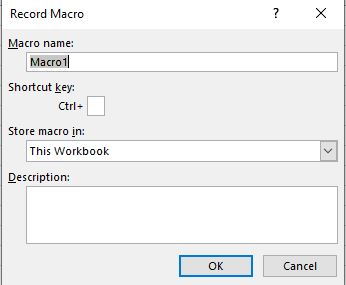
Macro Name Give your macro a descriptive name. For example, If you are adding a bunch of rows with this macro then you could call it something like, “AddNumMacro.”
Shortcut Key It’s optional to assign a shortcut key.
Store Macro This means that you will be storing your macro inside of your Excel file. So when you open the file at a future time, your macro will still be there. Also, if you send this Excel file to someone, they will also be able to use your macro.
Description This is useful if you have many macros and you need a quick reminder to refresh your memory. This is optional.
Try it out. Click on “Record Macro” and enter in this example:
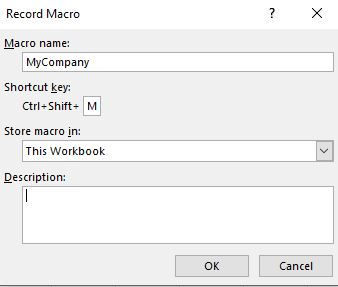
Step 1) In the Macro Name put “My Company.”
Step 2) Assign a shortcut key by entering in a capital M. (shift + m).
Step 3) Click ok.
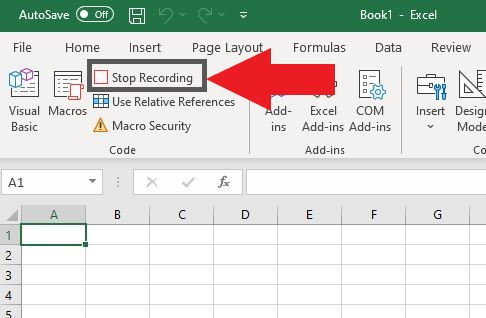
After clicking “OK” you will now be in “Recording” mode. And you will see the “Record Macro” button turn into the “Stop Recording” button. This means you are ready.
Type in your company or type in, “Acme Company” and hit enter.
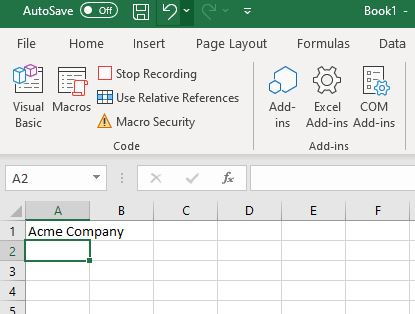
Next, hit the “Stop Recording” button.
Great. Now you’ve recorded your first macro. You can now use your shortcut key CTRL + SHIFT + M and it should write the text out on to the cell. You may need to erase cell A1 and try it again to see it work.
We can view the code for the macro we created. Click on “View Code” in the Developer tab.
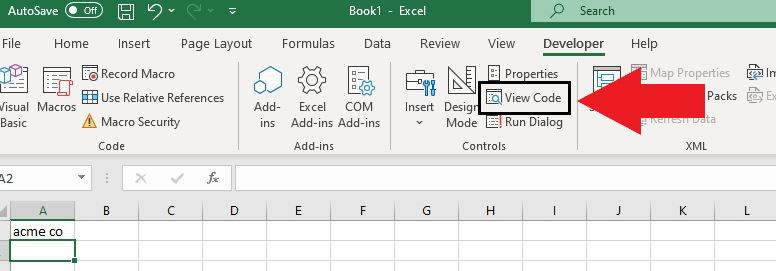
Your screen should look something like this. Double click on “Moduel1” and you should see the macro we created.
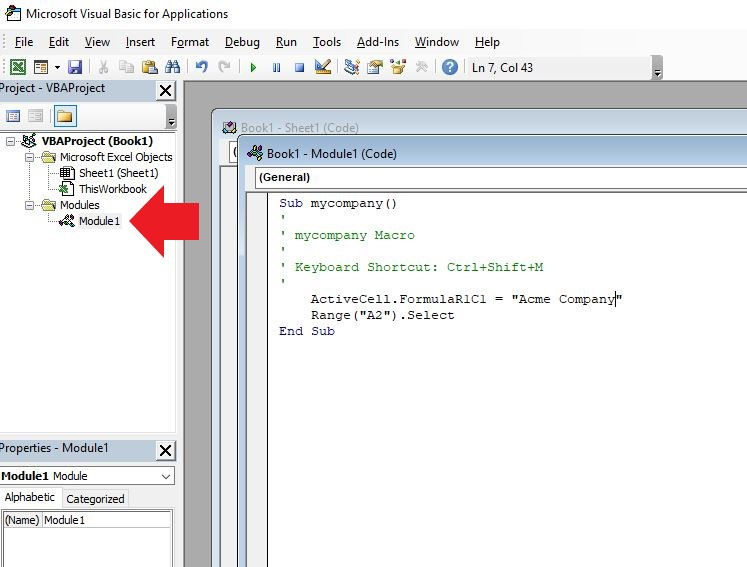
If your code does not look like this, it’s ok. You can delete any lines to make it look the same.
But as we can see, the main point is that this macro will write out text to a cell or when we run it manually. To run a macro manually simply, hit the “Macro” button and click on “Run.”
Congradulations you’ve created your first macro. Feel free to play around with this. Stay tuned for more tutorials from Excel Warrior.
